How to Draw a Collar
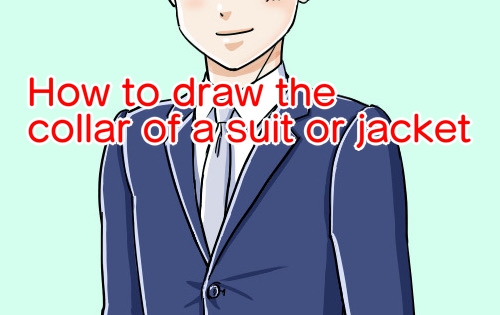

In this article, I'll show you how to draw suits and jackets, which are often used in uniforms and work situations!
The collar part of a typical suit is difficult to draw.
How do I draw them from different angles? Here are some answers to those questions!

1. Prepare a portrait illustration
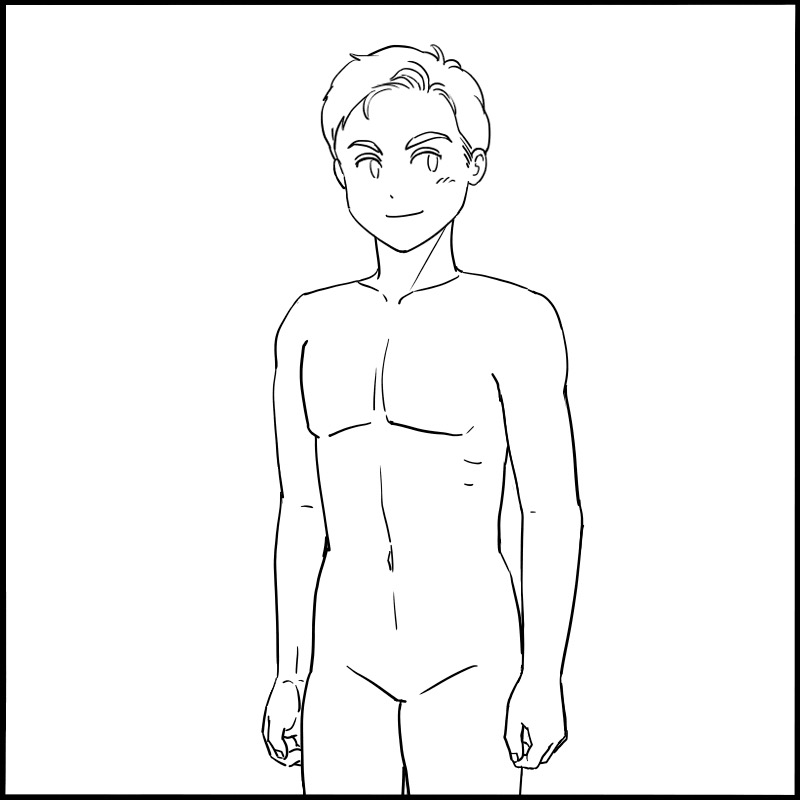
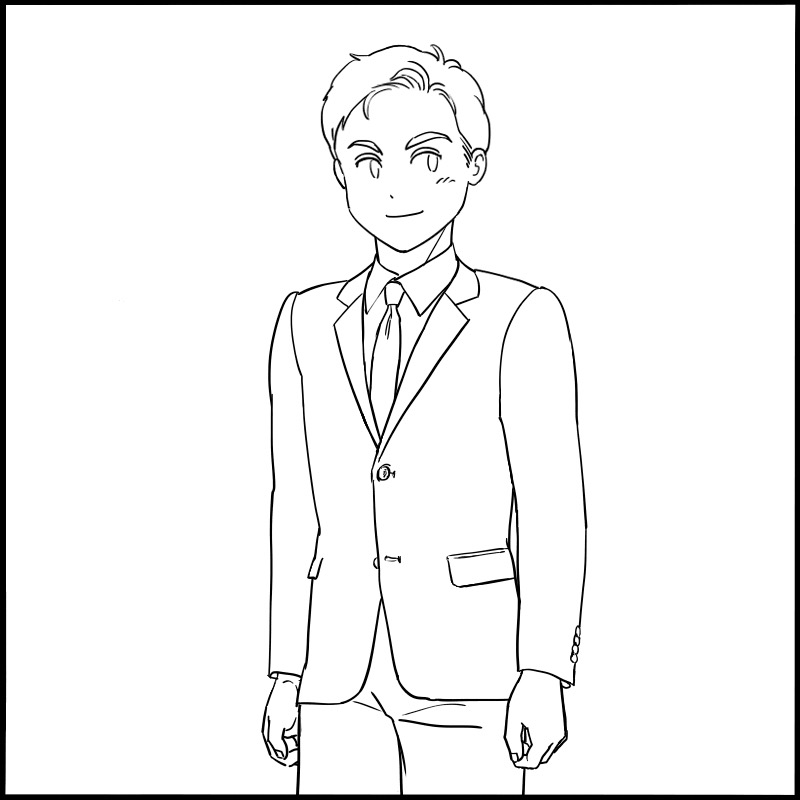
Let's start with a standard standing figure.
In this case, we have prepared an illustration of a man with an average body shape as shown in the image.
2. Draft the collar
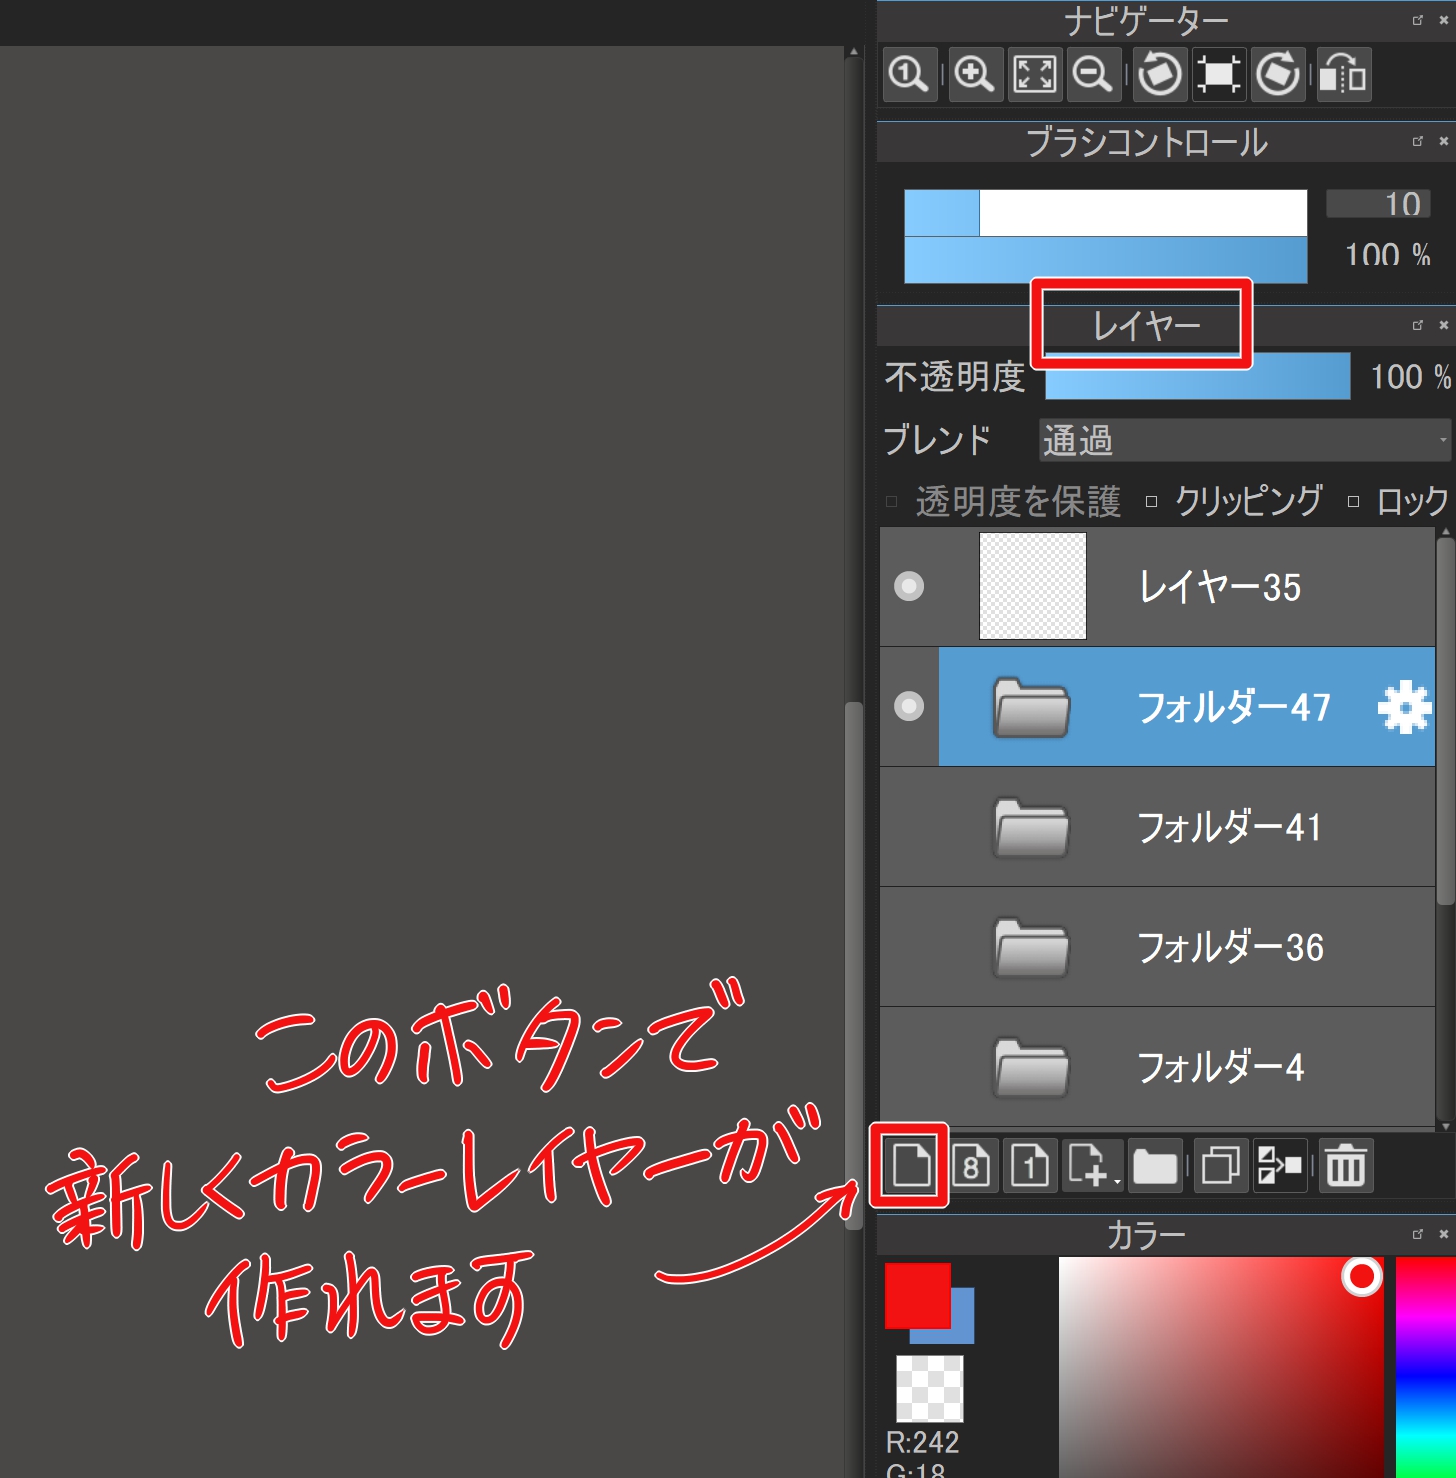
First, place a new layer.
You can create a new color layer by clicking the button at the bottom of the layer window.
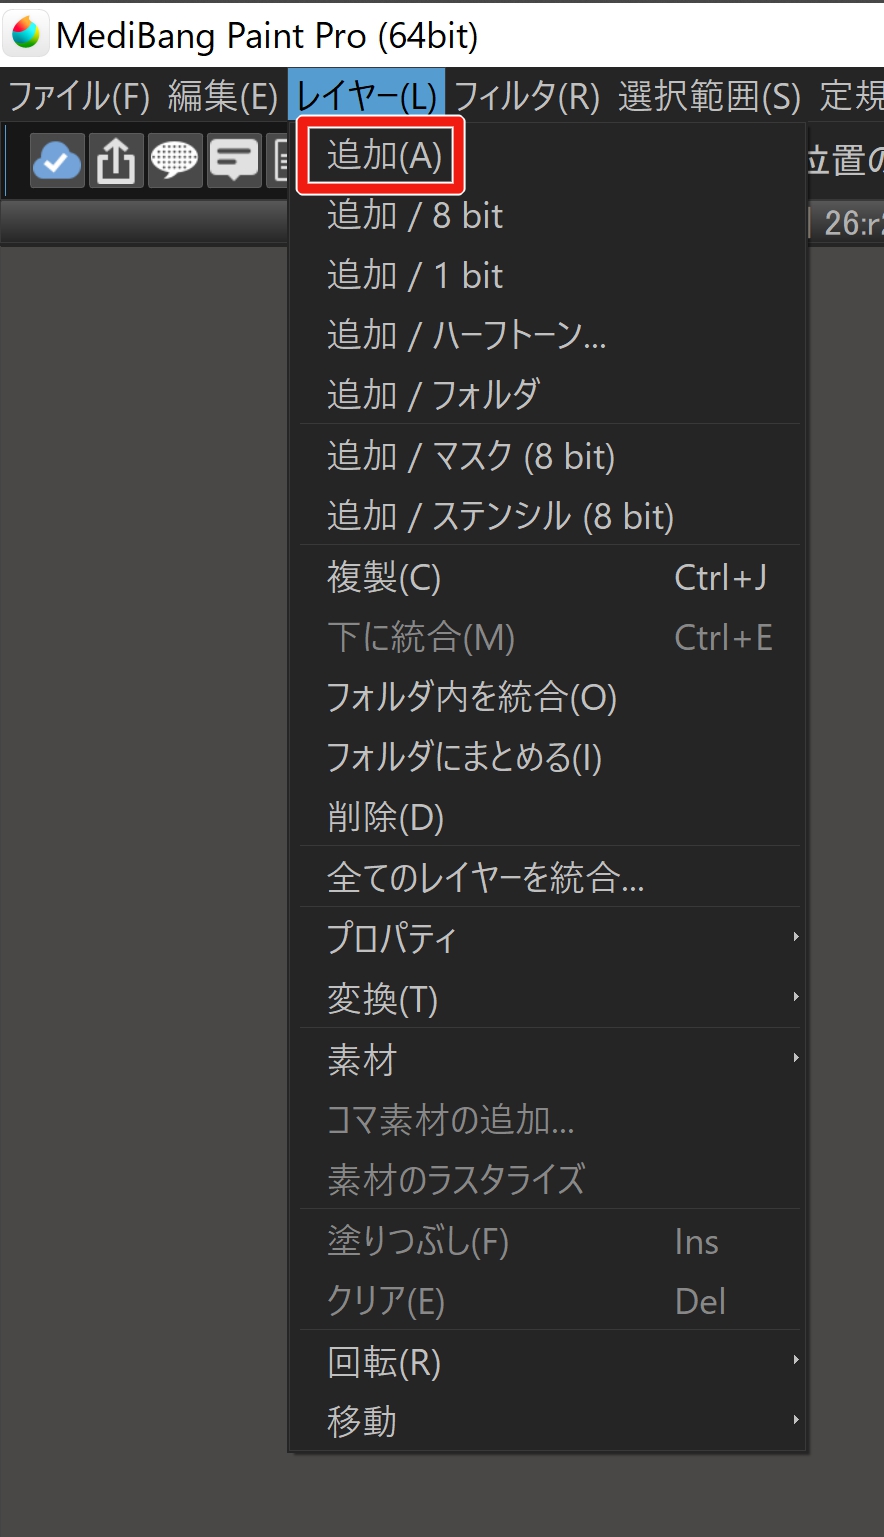
Alternatively, you can also create a new color layer by going to "Layers" in the menu and selecting "Add".
Once you have a new layer, use a pencil or other suitable drafting brush to draw a dot around the lower chest of the person.
This will be the point where the collar will overlap.
The position can be approximate!
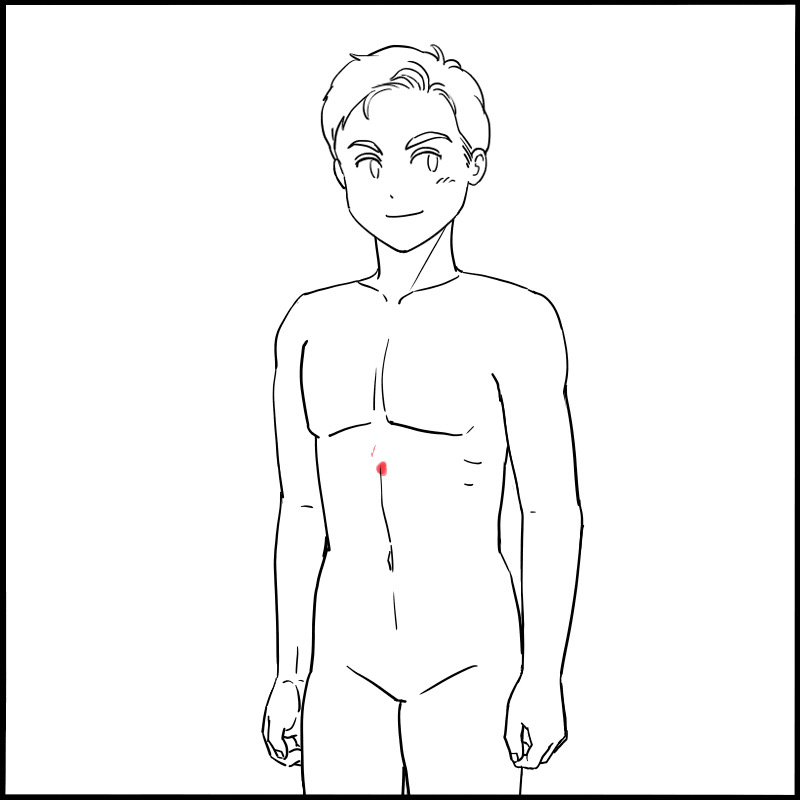
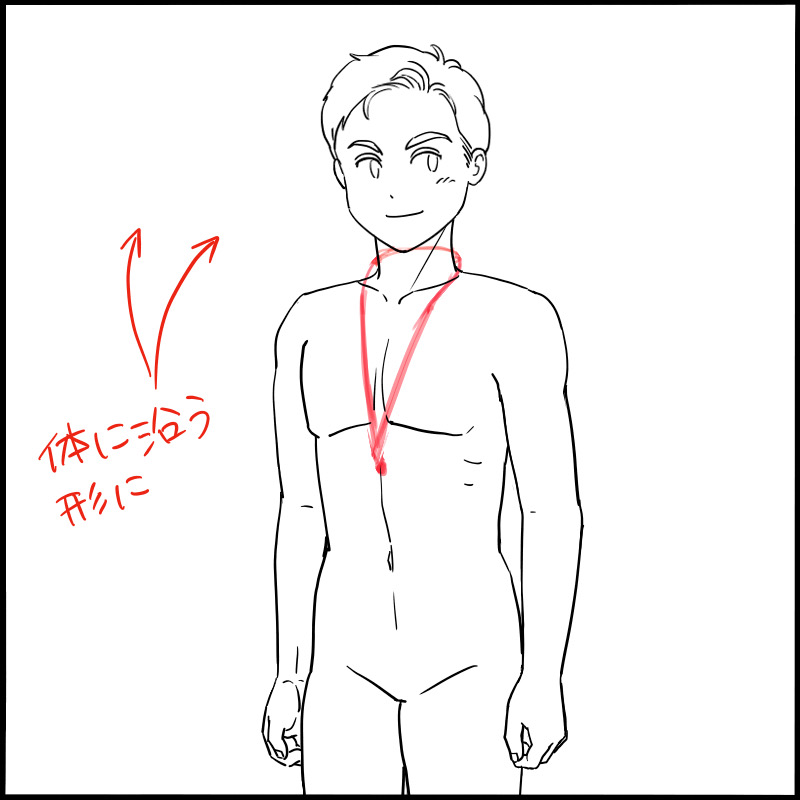
Next, take this point or the back of your neck and draw a line that goes around it.
It will be a gentle curve that follows the body.
(If the body is facing right, the curve will be in the opposite direction.
It's a good idea to draw the image of a person wearing a necklace.
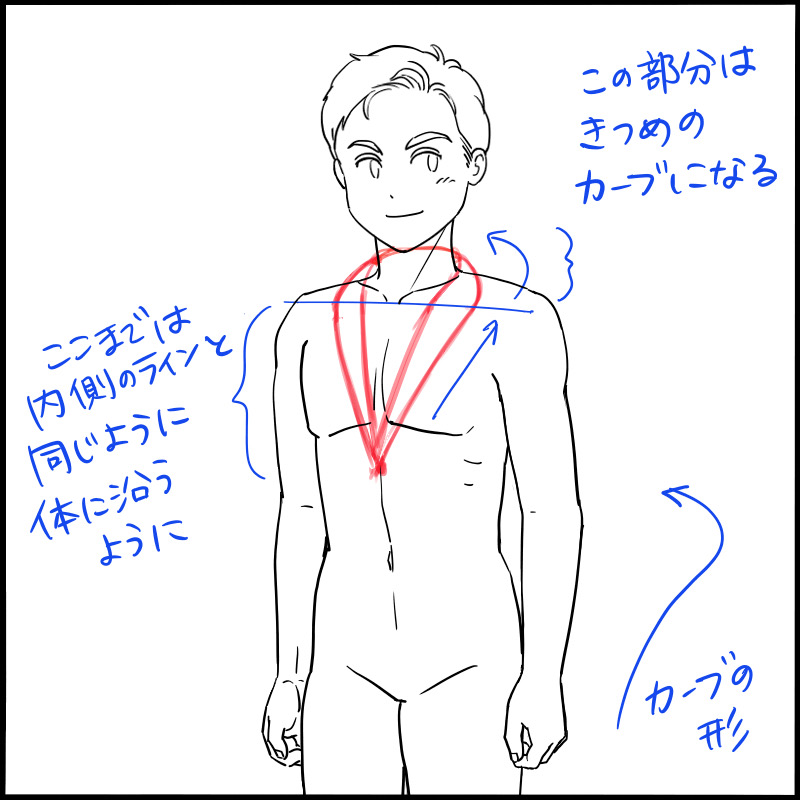
Now draw another line around the outside of the previous line.
The back of the neck should go through the same line.
3. Draw the three guide lines
Now, we will draw guide lines to draw the transition part of the collar.
First, draw a line around the bottom of the collarbone, in line with the shoulder line.
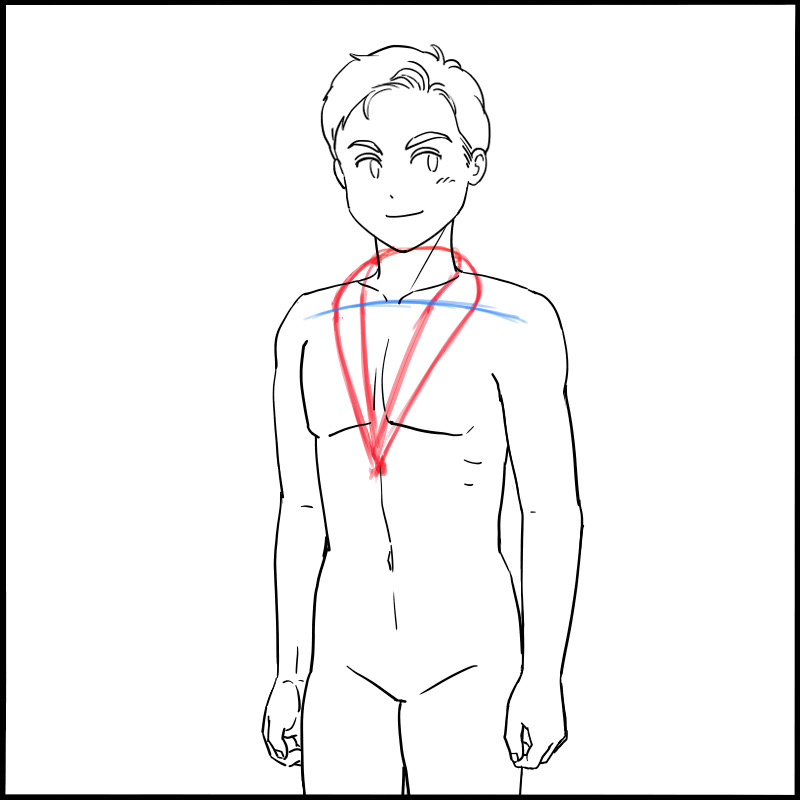
Draw a line up and down to match this line.
Now you have three guide lines.
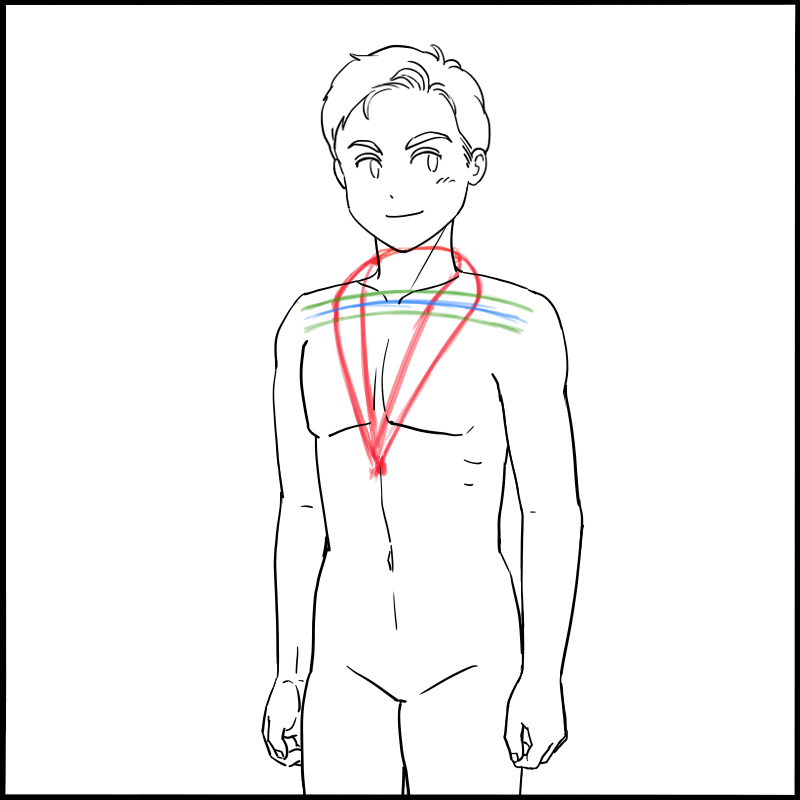
Add a shoulder line and a draft to cover the body.
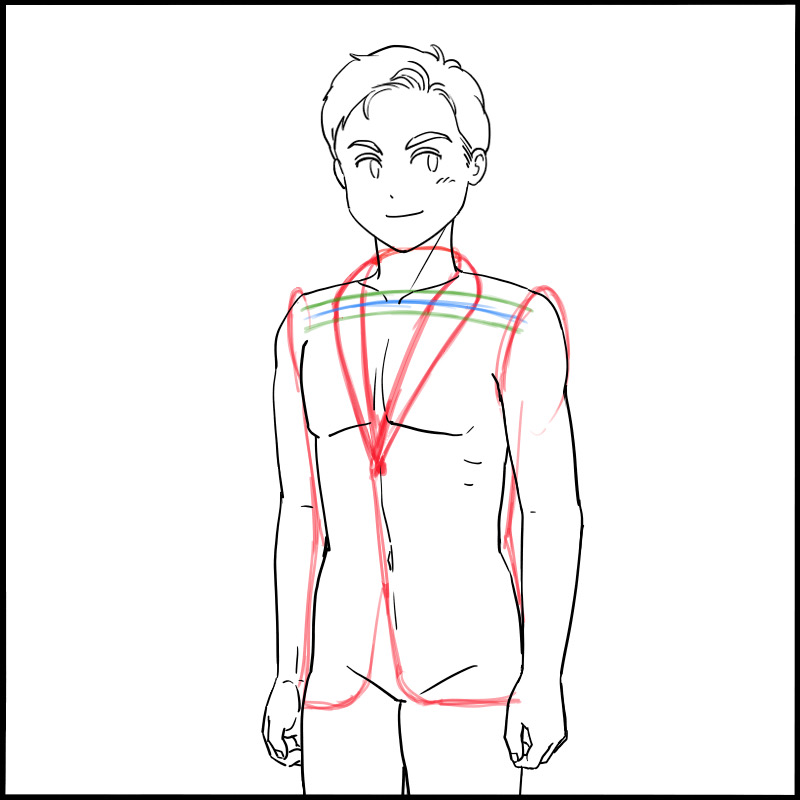
4. Pencil-in
.
Now that we have a rough draft, let's start adding the pen.
Let's start by tracing the inner line of the collar.
I won't draw the back of the neck since it's not visible.
(For clarity, all the lines so far are in light colors.
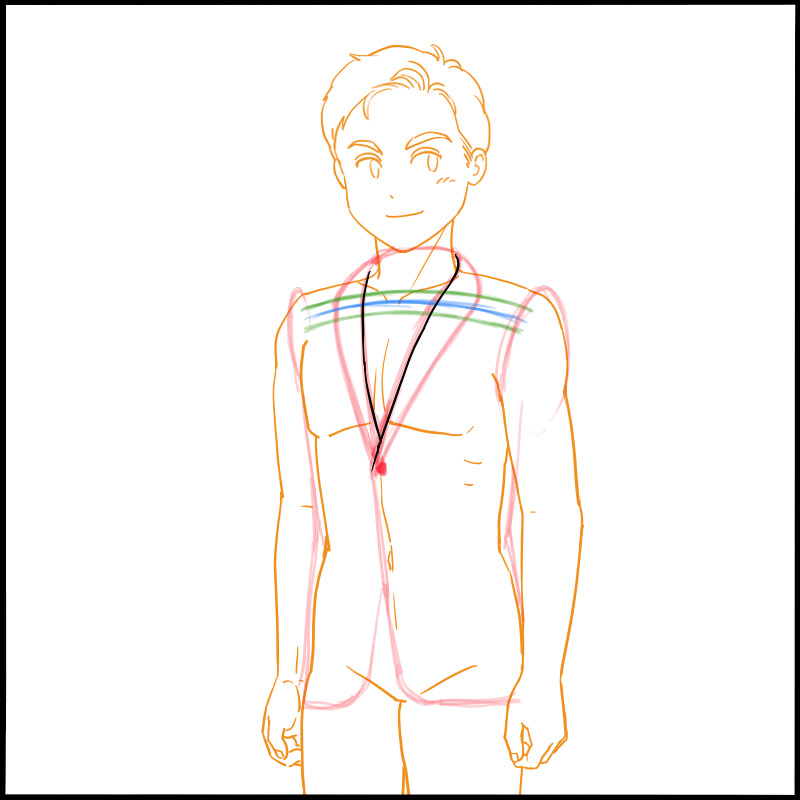
At this point, to represent the overlap of the collar, the right line towards you should be on top.
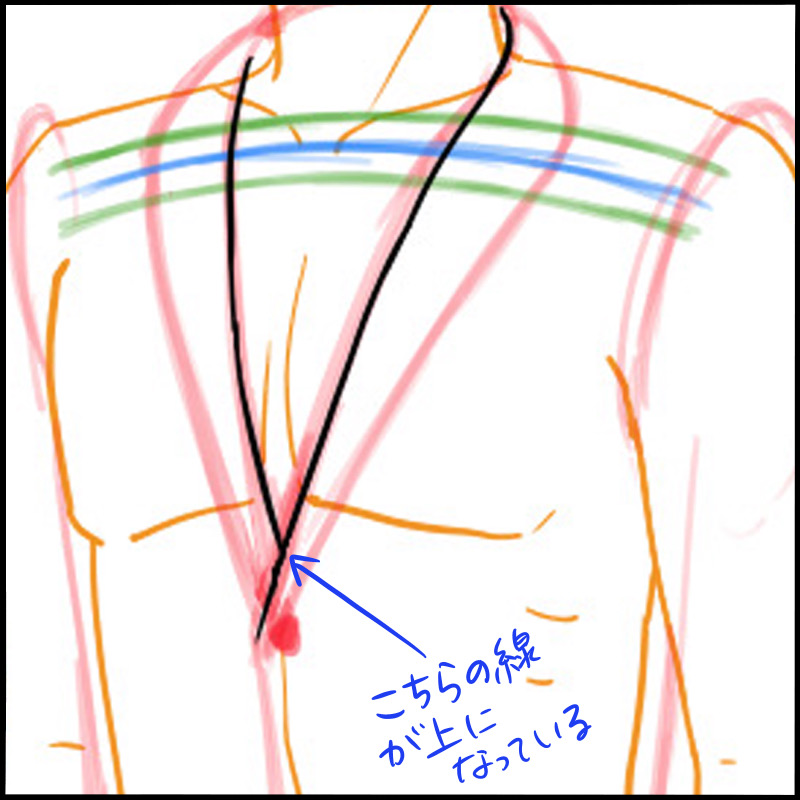
Next, trace a line around the outside of the collar.
Along the way, draw the incision for the collar, connecting the intersection with the guide line.
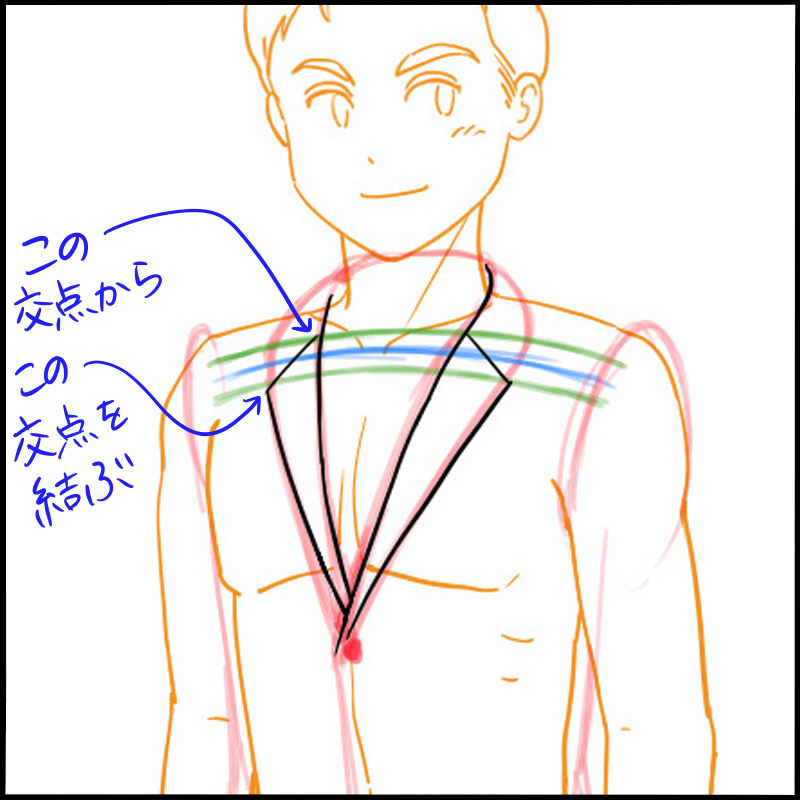
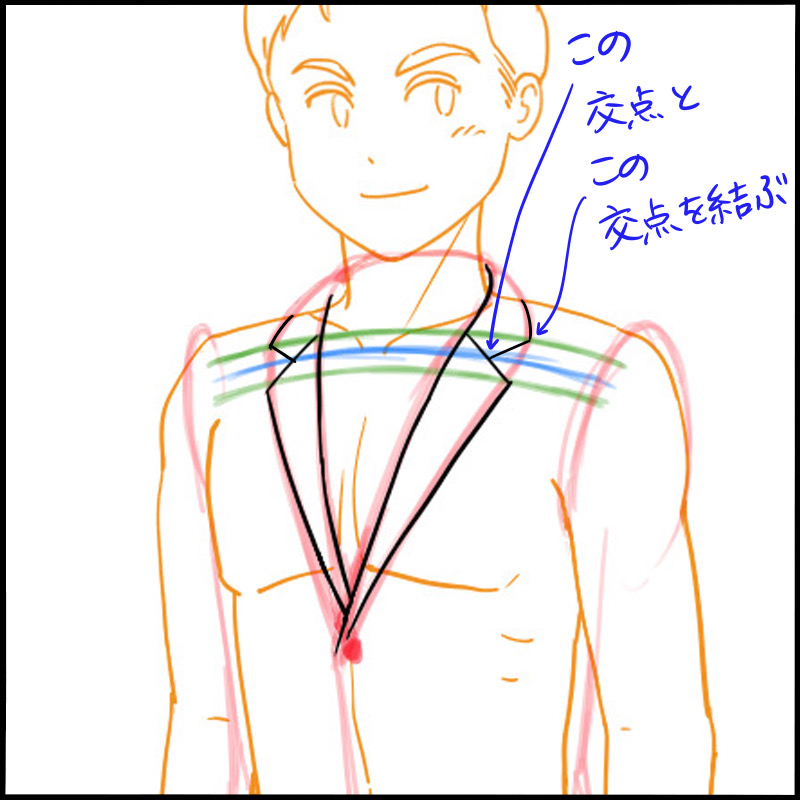
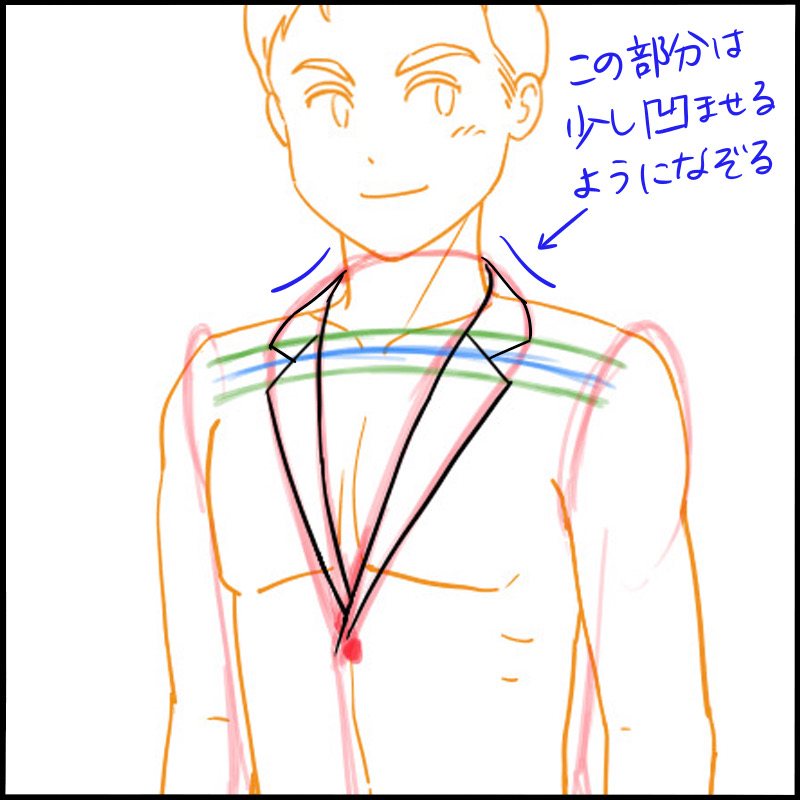
Now we have a collar!
Now we can draw the body and sleeves to make the body line a little fuller.
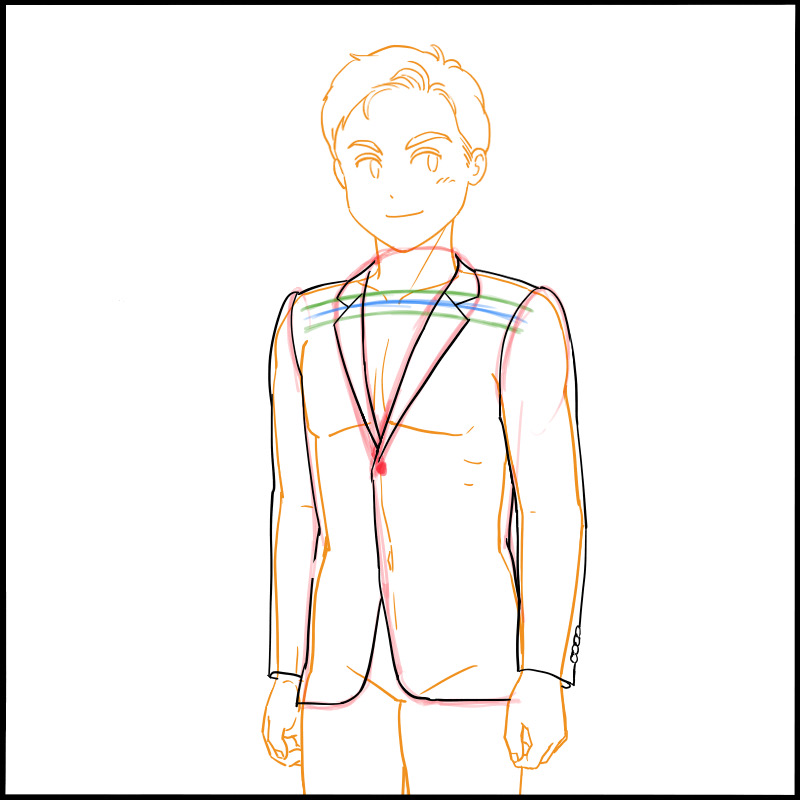
Add pockets, buttons, etc. to your liking, and you're done!

5. Various patterns
.
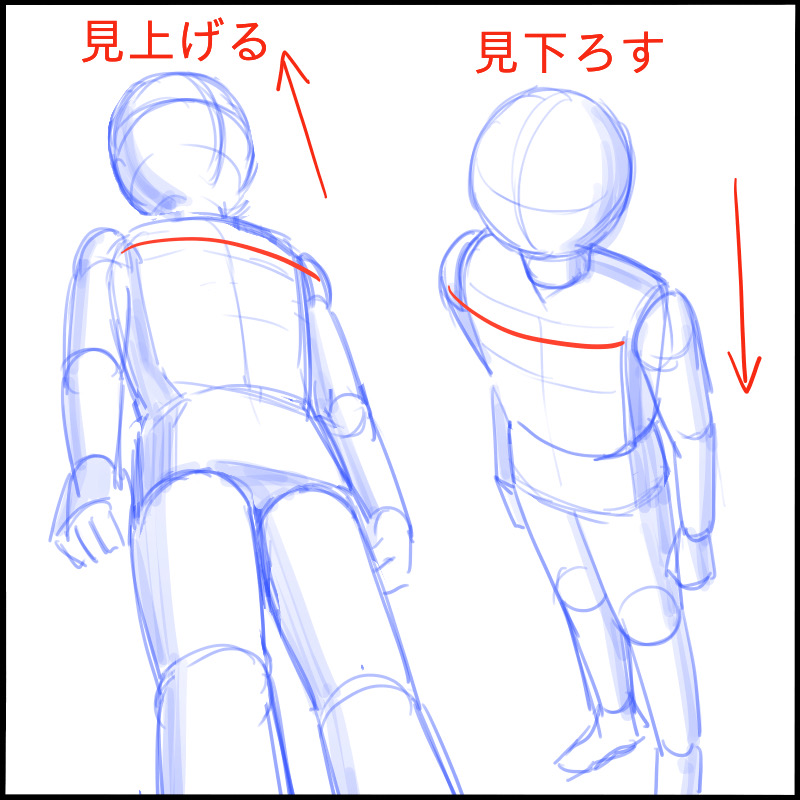
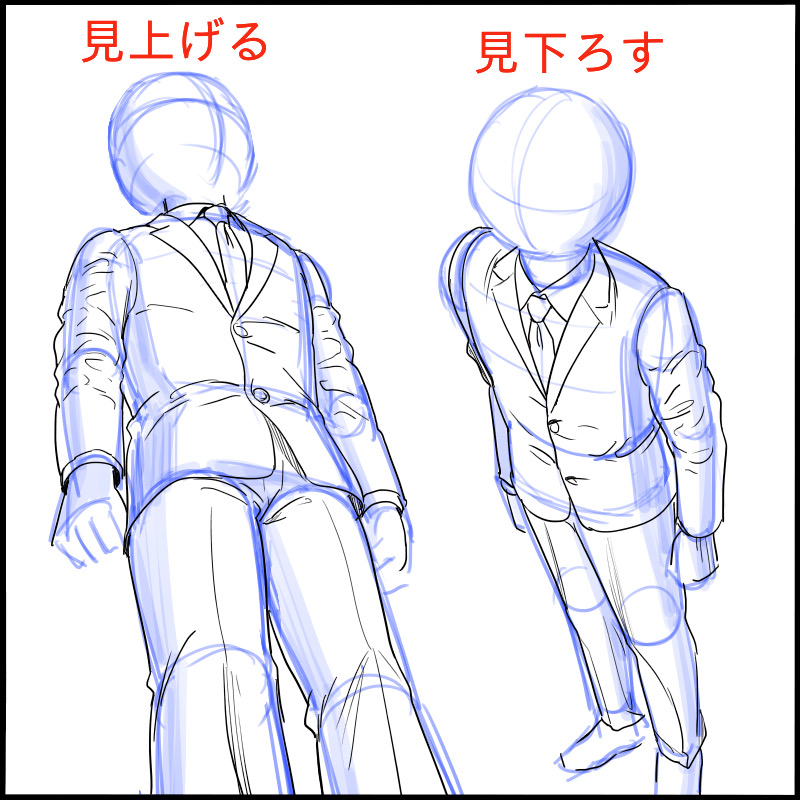
The point is to draw the guide lines with the curves of the body in mind.
Whether the composition is looking up or down, if the three lines are drawn firmly, the drawn collar will not look strange.
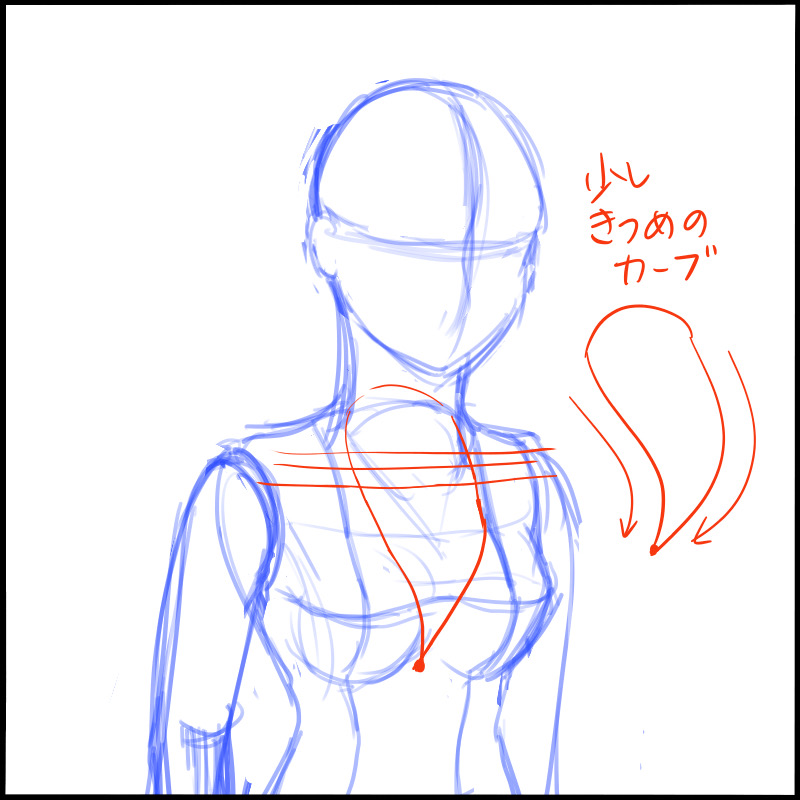
For women, the line around the neck needs to be slightly more curved.
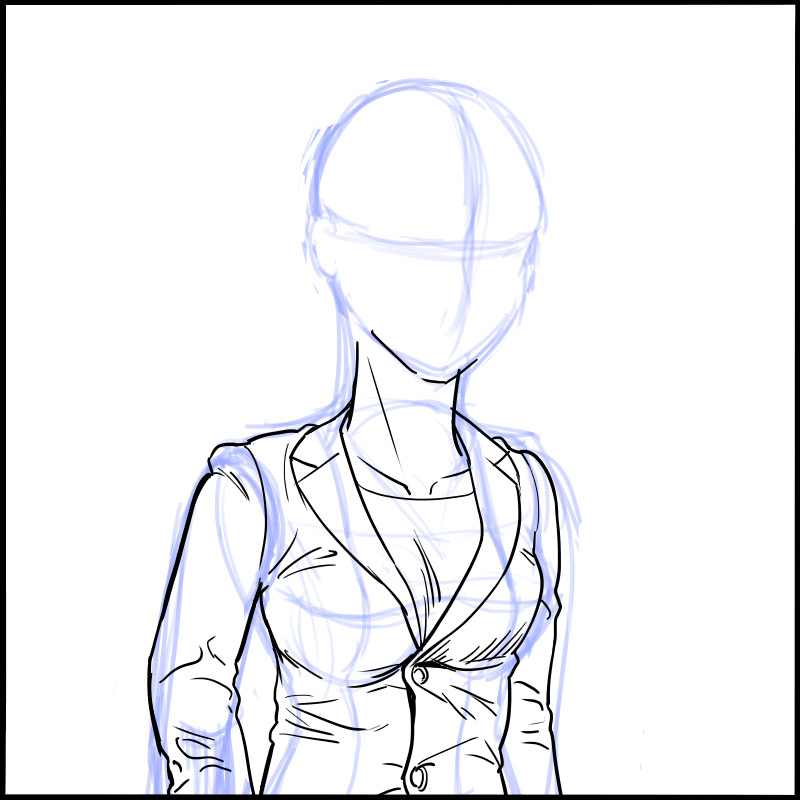
If you want to draw the collar with the front button open…
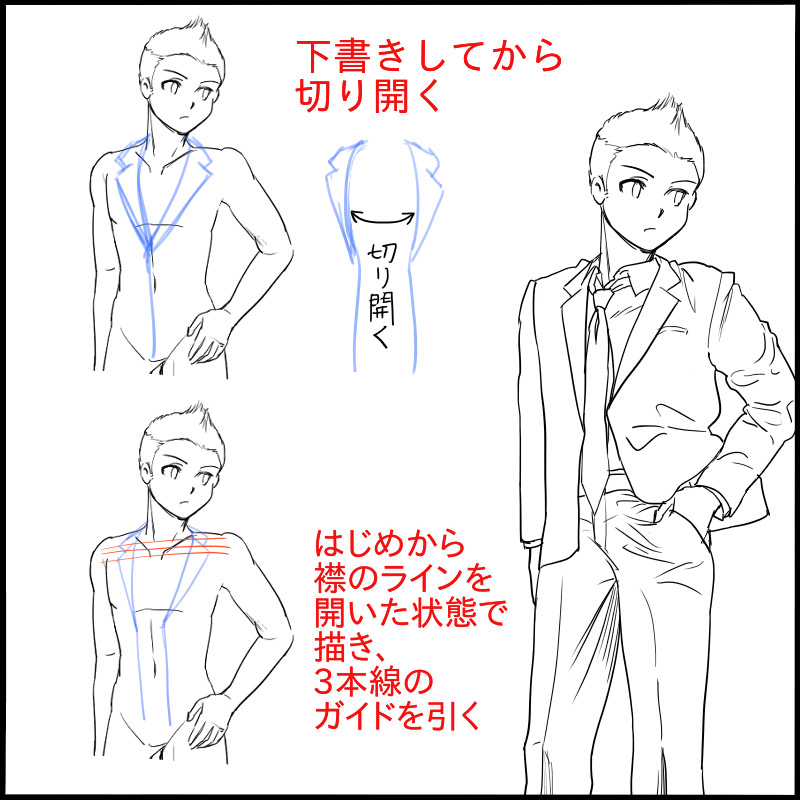
After drawing the collar in the usual way, use the Move tool to cut it to the left or right.
Make two points in the first draft and draw the collar line open from the beginning.
Either drawing method is acceptable.
How did you like it?
If you can draw the parts of the collar properly, you can make a suit with a three-dimensional look.
Of course, it can be applied to jackets, vests, and many other things!
If you become good at drawing suits, you will be able to expand the range of your illustrations.
(Text and pictures by Hiroshi Takeuchi)
thompsontootionese.blogspot.com
Source: https://medibangpaint.com/en/use/2021/02/how-to-draw-a-suit-or-jacket-collar/
0 Response to "How to Draw a Collar"
Post a Comment